Showing posts with label Develop. Show all posts

Android Studio 2.0 Preview: Android Emulator


Posted by, Jamal Eason, Product Manager, Android


An early preview of the new Android Emulator is now available to try out. As a part of Android Studio 2.0, the latest version of the Android Emulator can help you test your app on a wide range of screens size and configurations beyond the physical Android hardware you use to test.Moreover, using the official Android emulator enables you to test with latest Android versions. Building on this foundation, the top two benefits of new Android emulator are:


  • Speed & Performance: When emulating the latest Android 6.0 release (Marshmallow), we now support Symmetric Multi-Processing and have made significant I/O improvements in both the emulator and ADB. This means you will have faster performance when you are testing your app.


  • Usability & User Interface: The new Android Emulator includes a brand new user interface to make the emulator easy to use. You no longer have to rely on command-line parameters to use the Android emulator. Common tasks and emulator features are now just a mouse click or a keyboard shortcut away.


We previewed the user interface at the Android Dev Summit. You can try it out today along with the new version of ADB for faster APK installation and file transfers to the emulator. Check out the video for a demonstration of the new Android Emulator.


Android Dev Summit 2015: Emulator Demo


We are seeking early feedback to continue to deliver the experience and features that will make you more productive.


New Features in Android Emulator Preview


Performance Improvements


  • CPU Performance


    Android Studio now uses CPU acceleration on x86 emulator system images by default. Combined with new Symmetric Multi-Processor (SMP) support in Android 6.0 Marshmallow system images, the Android emulators can perform even faster than many physical Android devices. Multi-core support not only makes your apps and the emulator run faster but it provides the added advantage of speeding up common developer tasks such as installing APKs. Also, with SMP you can test apps that specifically target multi-processor Android devices.


  • Faster ADB


    In addition to faster CPU speeds in the emulator, there are a number of under-the-hood improvements that will make the experience faster. One of the bottlenecks in the development process that we worked on is the speed of pushing data between Android Studio and your device using ADB (Android Debug Bridge). When you use Android 6.0 Marshmallow and higher system images with the new Android Emulator, you can now push files across ADB up to five times faster than a real device. This will help you if you push large APK or files during your app development cycle.


User Interface


  • Toolbar


    The new interface exposes some of the most common emulator actions in a new toolbar and control panel instead of solely relying on command line options. For the preview, the Android Emulator toolbar enables actions, such as volume control, screen rotation, and screen-shots of the emulator window.


  • Window Zooming & Scaling


    Now you can resize your window simply by dragging a corner. You can also zoom and scroll to get a closer look at a portion of your screen.


Left: Zooming
Right: Window Scaling


  • Drag & Drop


    With the new emulator, you can not only drag and drop APKs for quick installation, but you can also drag and drop any file to your emulator’s internal SD card to help in testing.


Drag and Drop Files


  • Extended UI Controls


    In the extended controls window, additional options help you validate and test features in your app. As shown below, you can initiate a range of emulator actions such as making a virtual call, sending a virtual SMS, or controlling the power level of the emulator. You can additionally send a single GPS location point to the emulator or play back a custom set of KML or GPX points as well.


Phone Controls


Battery Controls

We are continuing to add more functionality and we will keep you up to date as we add more features.


What's Next & Setup


This is just the beginning of developments on the Android Emulator, so expect more features such as support more APIs levels, and adding more sensors with future versions of Android Studio. The new emulator along with Android Studio are available today on the Android Studio canary channel and tools preview channel.


Click here for details on how to setup the preview of the new Android Emulator.


We appreciate your feedback. Connect with us, the Android Studio development team, on Google+.


Android Studio 2.0 Preview

Posted by, Jamal Eason, Product Manager, Android


One the most requested features we receive is to make app builds and deployment faster in Android Studio. Today at the Android Developer Summit, we’re announcing a preview of Android Studio 2.0 featuring Instant Run that will dramatically improve your development workflow. With Android Studio 2.0, we are also including a preview of a new GPU Profiler.


All these updates are available now in the canary release channel, so we can get your feedback. Since this initial release is a preview, you may want to download and run an additional copy of Android Studio in parallel with your current version.


New Features in Android Studio 2.0


Instant Run: Faster Build & Deploy


Android Studio’s instant run feature allows you to to quickly see your changes running on your device or emulator.


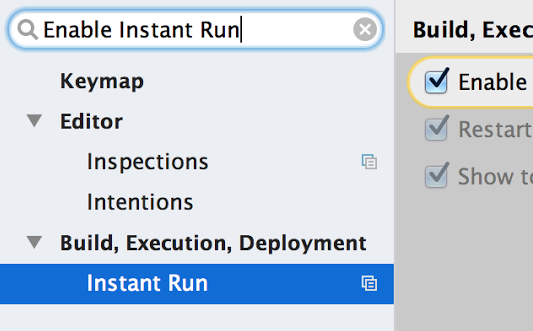
Getting started is easy. If you create a new project with Android Studio 2.0 then your projects are already setup. If you have a pre-existing app open Settings/Preferences, the go to Build, Execution, Deployment → Instant Run. Click on Enable Instant Run... This will ensure you have the correct gradle plugin for your project to work with Instant Run.


Enable Instant Run for Android Studio projects


Select Run as normal and Android Studio will perform normal compilation, packaging and install steps and run your app on your device or emulator. After you make edits to your source code or resources, pressing Run again will deploy your changes directly into the running app.


New Run & Stop Actions in Android Studio for Instant Run


For a more detailed guide setup and try Instant Run, click here.


GPU Profiler


Profiling your OpenGL ES Android code is now even easier with the GPU Profiler in Android Studio. The tool is in early preview, but is very powerful and not only shows details about the GL State and Commands, you can record entire sessions and walk through the GL Framebuffer and Textures as your app is running OpenGL ES Code.


Android Studio GPU Profiler


To get started, first download the GPU Debugging Tools package from the Android Studio SDK Manager.
Click here for more details about the GPU Profiler tool and how to set up your Android app project for profiling.


Whats Next


This is just a taste of some of the bigger updates in this latest release of Android Studio. We'll be going through the full release in more detail at the Android Developer Summit (livestreamed on Monday and Tuesday). Over the next few weeks, we'll be showing how to take advantage of even more features in Android Studio 2.0, so be sure to check back in.


If you're interested in more Android deep technical content, we will be streaming over 16 hours of content from the inaugural Android Developer Summit over the next two days, and together with Codelabs, all of this content will be available online after the Summit concludes.


Android Studio 2.0 is available today on the Android Studio canary channel. Let us know what you think of these new features by connecting with the Android Studio development team on Google+.


Hungering for Game Utilities?

Posted by Alex Ames, Fun Propulsion Labs*


Originally posted to the Google Developers blog


At Fun Propulsion Labs we spend some of our time building sample games to help demonstrate how to make easy-to-build, performant, cross-platform games. With the growth of Google Cardboard, we got to work and over many long evenings, feeding our animal hunger on sushi, we came up with Zooshi. Zooshi is an open source, cross-platform game written in C++ which supports:


  • Android, Android TV, Windows, OSX, and Linux

  • Google Cardboard

  • Google Play Games Services sign-in and leaderboards on Android

  • Level customization


Zooshi serves as a demonstration of how to build Android games using a suite of newly released and updated open source game technologies from Google:


  • Motive drives our Animation system, giving life and movement to the characters and environment.

  • CORGI, the Component Oriented Reusable Game Interface, is an Entity-Component system designed to allow users to define complicated game objects as collections of modular, custom-defined behaviors.

  • FlatUI is a straightforward immediate mode GUI system with a light footprint that makes building up user interfaces a breeze.

  • Scene Lab allows designers to design levels and edit entities from right in the game without needing to use an external editor.

  • Breadboard provides an easy to use node based scripting system for editing entity behaviors that's accessible to designers without deep knowledge of programming.

  • FPLBase is a cross-platform API layer, for abstracting low-level tasks like reading input and creation of graphical contexts.


As in our previous release, Pie Noon, we also made extensive use of Flatbuffers, Mathfu, fplutil, and WebP.


You can download the game in the Play Store and the latest open source release from our GitHub page. We invite you to learn from the code to see how you can apply these libraries and utilities in your own Android games. Take advantage of our discussion list if you have any questions, and don’t forget to toss some sushi around while you’re at it!


* Fun Propulsion Labs is a team within Google that's dedicated to advancing gaming on Android and other platforms.

API 23 SDK now available for Android Wear

Posted by Wayne Piekarski, Developer Advocate


The new LG Watch Urbane 2nd Edition LTE is the first watch to run Android 6.0 Marshmallow (API 23) for Android Wear. Currently, all other Android Wear watches implement API 22, and in the coming months, these will receive an OTA update for API 23 as well.


So what does this mean for you as an Android Wear developer? You will need to ensure that your apps are compatible with both API 23 and API 22 watches. While you can start implementing the new features in this post, you still need to maintain backwards compatibility until all watches are upgraded.


New permissions model and samples


API 23 introduces a new runtime permissions model for both phones and watches. The new permissions model allows users to pick and choose which permissions to grant apps at the time of use. In addition, new permissions settings allow users to turn on and off app permissions at any time.


To use the new permissions model on Wear, read Permissions on Android Wear. This training guide provides an in-depth discussion of Wear-specific scenarios, such as when your Wear app relies on a phone-side permission. In addition, all of the Android Wear samples have been updated to use the new permissions model, and a new RuntimePermissionsWear sample shows how to handle permission requests across devices.


When you are ready, you can update your application on both the phone and watch side to use compileSdkVersion 23 and targetSdkVersion 23. Make sure that you check and request the permissions needed by your app at runtime, on both the phone and the watch. It is important that you do not change targetSdkVersion to 23 until you have implemented the permission checks properly, since it changes how the system installs and runs the app. For example, an API call that might have previously returned a result could now fail, causing the app to behave in unexpected ways.


-round and -notround resource qualifiers


API 23 makes it easier to build apps for both round and square Android Wear watches. We listened to your feedback and added new resource qualifiers for -round and -notround, so you can use the resource system to load the appropriate images, layouts, and strings based on the type of watch you are working with. You can also combine this with existing resource qualifiers -hdpi, -tvdpi, -280dpi, and -360dpi for the various Android Wear watches that are currently available. All of the existing classes in the wearable UI library, such as WatchViewStub, BoxInsetLayout, and WearableFrameLayout will continue to work as well, so you do not need to change your code. The -round and -notround resource qualifiers will not work on API 22 devices, so you cannot assume they will be available until all devices are on API 23.


Watches with speakers


The LG Watch Urbane 2nd Edition LTE is the first watch to include speaker support, so you can now add sounds to your Wear app. You can play audio files using the same APIs that are available on Android phones, such as AudioTrack, MediaPlayer, and ExoPlayer. Check out the sample and documentation to learn how to detect when the speaker is available on a Wear device and play sounds through it.


Intel x86 support


The new TAG Heuer Connected, along with other upcoming Android Wear watches, is based on Intel x86 processors. If you are working only with Java code, your apps will automatically work on any architecture. However, if you’re using the NDK, you’ll need to provide both armeabi-v7a and x86 shared libraries in your wearable APK. Since only one wearable app can be bundled in a phone app, it is not possible to deliver different APKs to different watches based on architecture. If your wearable APK is missing an x86 library, it will fail to install on x86 watches with INSTALL_FAILED_NO_MATCHING_ABIS and code -113.


If you are using Android Studio, you will need to adjust your build.gradle file to include:


ndk {
abiFilters = ['armeabi-v7a','x86']
}

If you are using the NDK directly, you will need to modify your Application.mk file to use:


APP_ABI := armeabi-v7a x86


These changes should only be made for the wearable APK, and you can continue to support other ABIs on the phone side. You can test your application by checking if it works on the x86 emulator provided by the SDK Manager.


Updated emulator


New Android Wear emulator images for API 23 and x86 watches are available to download from the SDK Manager in Android Studio. We have also added profiles that represent every available Android Wear watch, so you can easily test on any device you want. It is also important that you understand and test all the combinations of phones (API <= 22, API = 23) and wearables (API 22, API 23), so that your app works for all users.


Updates to existing watches


The new emulator images allow you to get started immediately with testing and deploying updated apps for users with API 23 watches. The schedule for updating existing Android Wear watches via OTA updates has not been announced yet. We will announce the update schedule on the Android Wear Developers Google+ community. We’ll also let you know when the rollout is complete, and API 22 support for Android Wear is no longer needed.


Minimum purchase price for apps and in-app products reduced on Google Play

Posted by Alistair Pott, Product Manager, Google Play


Available in more than 190 countries, Google Play is a global platform for developers to build high quality apps and successful businesses. But every market has its own unique challenges and opportunities. Purchasing behavior, in particular, varies significantly between markets. So to provide developers with more flexibility, we've worked to adapt Google Play pricing options to better suit local consumers and make content more accessible.


Following a successful pilot in India earlier this year, today, developers have the option to reduce the price of their premium titles and in-app products in 17 more countries to these new minimum thresholds:


Countries affected:


  • Brazil: R$ 0.99 (was R$2.00)

  • Chile: CLP $200.00 (was CLP $500.00)

  • Colombia: COP$ 800.00 (was COP$ 2000.00)

  • Egypt: E£2 Previous (was E£7)

  • Hungary: Ft 125.00 (was Ft 225.00)

  • Indonesia: Rp 3,000.00 (was Rp 12,000.00)

  • Malaysia: RM 1.00 (was RM 3.50)

  • Mexico: MXN$ 5.00 (was MXN$ 9.90)

  • Nigeria: ₦40 (was ₦195)

  • Peru: S/. 0.99 (was S/. 3.00)

  • Philippines: ₱15.00 (was ₱43.00)

  • Poland: zÅ‚1.79 (was zÅ‚2.99)

  • Russia: руб 15.00 (was руб 30.00)

  • Saudi Arabia:﷼ 0.99 (was 4.00﷼)

  • South Africa: R3.99 (was R10.00)

  • Thailand: ฿10.00 (was ฿32.00)

  • Turkey: ₺0.59 (was ₺2.00)

  • Ukraine: ₴5.00 (was ₴8.00)

  • Vietnam: ₫6,000 (was ₫21,000.00)


You can lower the price of your apps and games right away by visiting the Google Play Developer Console and clicking on “Pricing & Distribution” or “In-app Products” for your apps.


We hope this change allows you to reach more people around the world so that you can continue to grow your business on Google Play.


New in Android Samples: Authenticating to remote servers using the Fingerprint API

Posted by Takeshi Hagikura, Yuichi Araki, Developer Programs Engineer


As we announced in the previous blog post, Android 6.0 Marshmallow is now publicly available to users. Along the way, we’ve been updating our samples collection to highlight exciting new features available to developers.


This week, we’re releasing AsymmetricFingerprintDialog, a new sample demonstrating how to securely integrate with compatible fingerprint readers (like Nexus Imprint) in a client/server environment.


Let’s take a closer look at how this sample works, and talk about how it complements the FingerprintDialog sample we released earlier during the public preview.


Symmetric vs Asymmetric Keys


The Android Fingerprint API protects user privacy by keeping users’ fingerprint features carefully contained within secure hardware on the device. This guards against malicious actors, ensuring that users can safely use their fingerprint, even in untrusted applications.


Android also provides protection for application developers, providing assurances that a user’s fingerprint has been positively identified before providing access to secure data or resources. This protects against tampered applications, providing cryptographic-level security for both offline data and online interactions.


When a user activates their fingerprint reader, they’re unlocking a hardware-backed cryptographic vault. As a developer, you can choose what type of key material is stored in that vault, depending on the needs of your application:


  • Symmetric keys: Similar to a password, symmetric keys allow encrypting local data. This is a good choice securing access to databases or offline files.

  • Asymmetric keys: Provides a key pair, comprised of a public key and a private key. The public key can be safely sent across the internet and stored on a remote server. The private key can later be used to sign data, such that the signature can be verified using the public key. Signed data cannot be tampered with, and positively identifies the original author of that data. In this way, asymmetric keys can be used for network login and authenticating online transactions. Similarly, the public key can be used to encrypt data, such that the data can only be decrypted with the private key.


This sample demonstrates how to use an asymmetric key, in the context of authenticating an online purchase. If you’re curious about using symmetric keys instead, take a look at the FingerprintDialog sample that was published earlier.


Here is a visual explanation of how the Android app, the user, and the backend fit together using the asymmetric key flow:


1. Setting Up: Creating an asymmetric keypair


First you need to create an asymmetric key pair as follows:


KeyPairGenerator.getInstance(KeyProperties.KEY_ALGORITHM_EC, "AndroidKeyStore");
keyPairGenerator.initialize(
new KeyGenParameterSpec.Builder(KEY_NAME,
KeyProperties.PURPOSE_SIGN)
.setDigests(KeyProperties.DIGEST_SHA256)
.setAlgorithmParameterSpec(new ECGenParameterSpec("secp256r1"))
.setUserAuthenticationRequired(true)
.build());
keyPairGenerator.generateKeyPair();


Note that .setUserAuthenticationRequired(true) requires that the user authenticate with a registered fingerprint to authorize every use of the private key.

Then you can retrieve the created private and public keys with as follows:


KeyStore keyStore = KeyStore.getInstance("AndroidKeyStore");
keyStore.load(null);
PublicKey publicKey =
keyStore.getCertificate(MainActivity.KEY_NAME).getPublicKey();

KeyStore keyStore = KeyStore.getInstance("AndroidKeyStore");
keyStore.load(null);
PrivateKey key = (PrivateKey) keyStore.getKey(KEY_NAME, null);


2. Registering: Enrolling the public key with your server


Second, you need to transmit the public key to your backend so that in the future the backend can verify that transactions were authorized by the user (i.e. signed by the private key corresponding to this public key).
This sample uses the fake backend implementation for reference, so it mimics the transmission of the public key, but in real life you need to transmit the public key over the network.


boolean enroll(String userId, String password, PublicKey publicKey);


3. Let’s Go: Signing transactions with a fingerprint


To allow the user to authenticate the transaction, e.g. to purchase an item, prompt the user to touch the fingerprint sensor.


Then start listening for a fingerprint as follows:


Signature.getInstance("SHA256withECDSA");
KeyStore keyStore = KeyStore.getInstance("AndroidKeyStore");
keyStore.load(null);
PrivateKey key = (PrivateKey) keyStore.getKey(KEY_NAME, null);
signature.initSign(key);
CryptoObject cryptObject = new FingerprintManager.CryptoObject(signature);

CancellationSignal cancellationSignal = new CancellationSignal();
FingerprintManager fingerprintManager =
context.getSystemService(FingerprintManager.class);
fingerprintManager.authenticate(cryptoObject, cancellationSignal, 0, this, null);


4. Finishing Up: Sending the data to your backend and verifying


After successful authentication, send the signed piece of data (in this sample, the contents of a purchase transaction) to the backend, like so:


Signature signature = cryptoObject.getSignature();
// Include a client nonce in the transaction so that the nonce is also signed
// by the private key and the backend can verify that the same nonce can't be used
// to prevent replay attacks.
Transaction transaction = new Transaction("user", 1, new SecureRandom().nextLong());
try {
signature.update(transaction.toByteArray());
byte[] sigBytes = signature.sign();
// Send the transaction and signedTransaction to the dummy backend
if (mStoreBackend.verify(transaction, sigBytes)) {
mActivity.onPurchased(sigBytes);
dismiss();
} else {
mActivity.onPurchaseFailed();
dismiss();
}
} catch (SignatureException e) {
throw new RuntimeException(e);
}


Last, verify the signed data in the backend using the public key enrolled in step 2:


@Override
public boolean verify(Transaction transaction, byte[] transactionSignature) {
try {
if (mReceivedTransactions.contains(transaction)) {
// It verifies the equality of the transaction including the client nonce
// So attackers can't do replay attacks.
return false;
}
mReceivedTransactions.add(transaction);
PublicKey publicKey = mPublicKeys.get(transaction.getUserId());
Signature verificationFunction = Signature.getInstance("SHA256withECDSA");
verificationFunction.initVerify(publicKey);
verificationFunction.update(transaction.toByteArray());
if (verificationFunction.verify(transactionSignature)) {
// Transaction is verified with the public key associated with the user
// Do some post purchase processing in the server
return true;
}
} catch (NoSuchAlgorithmException | InvalidKeyException | SignatureException e) {
// In a real world, better to send some error message to the user
}
return false;
}


At this point, you can assume that the user is correctly authenticated with their fingerprints because as noted in step 1, user authentication is required before every use of the private key. Let’s do the post processing in the backend and tell the user that the transaction is successful!


Other updated samples


We also have a couple of Marshmallow-related updates to the Android For Work APIs this month for you to peruse:


  • AppRestrictionEnforcer and AppRestrictionSchema
    These samples were originally released when the App Restriction feature was introduced as a part of Android for Work API in Android 5.0 Lollipop. AppRestrictionEnforcer demonstrates how to set restriction to other apps as a profile owner. AppRestrictionSchema defines some restrictions that can be controlled by AppRestrictionEnforcer. This update shows how to use 2 additional restriction types introduced in Android 6.0.


  • We hope you enjoy the updated samples. If you have any questions regarding the samples, please visit us on our GitHub page and file issues or send us pull requests.

    Google Developers teams up with General Assembly to launch Android Development Immersive training course

    Posted by Peter Lubbers, Senior Program Manager, Google Developer Training


    Today at the Big Android BBQ we announced that we have teamed up with General Assembly (GA), a global education institution transforming thinkers into creators, to create a new Android Development Immersive training course. This 12-week, full-time course will be offered beginning in January 2016 at GA’s New York campus, and in February at GA’s San Francisco campus and will roll out to additional campuses over the course of the next year. It is the first in-person training program of its kind that Google Developers has designed and built.


    The Google Developer Relations team teamed up with General Assembly to ensure the Android Development Immersive bootcamp provides developers with access to the best instructors and latest and greatest hands-on material to create successful app experiences and businesses. To effectively reach over a billion of Android users globally, it's important for developers to build high-quality apps that are beautifully designed, performant, and delightful to use.


    “We are constantly looking at the economy and job market for what skills are most in-demand. Demand for developers who can address this market and build new applications is tremendous,” said Jake Schwartz, co-founder and CEO, General Assembly. “Developing this course in partnership with Google Developers allows us to provide students with the most relevant skills, ensuring a reliable pipeline of talented developers ready to meet the urgent demand of companies in the Android ecosystem, a key component of GA's education-to-employment model."


    Registration in the Android Development Immersive includes access to GA’s career preparation services and support, also known as Outcomes, includes assistance in creating portfolio-ready projects, access to career development workshops, networking events, and coaching and support in the job search process. Through in-person hiring events, mock interviews & GA’s online job search platform, graduates connect with GA’s hiring partners, which consists of close to 2,000 employers globally.


    One of these employers is Vice Media. "I'm really excited to see the candidates coming out of the GA Android course. The fact that they're working with both Google and potential employers to shape the curriculum around real-world problems will make a huge difference. Textbook learning is one thing, but classroom learning with practitioners is a level we have all been waiting for. In fact, Vice Media is going to be hiring an apprentice right out of this course," said Ben Jackson, Director of Mobile Apps for Vice Media.


    Learn more and sign up here.

    Android Support Library 23.1

    Posted by Ian Lake, Developer Advocate


    The Android Support Library is a collection of libraries available on a wide array of API levels that help you focus on the unique parts of your app, providing pre-built components, new functionality, and compatibility shims.


    With the latest release of the Android Support Library (23.1), you will see improvements across the Support V4, Media Router, RecyclerView, AppCompat, Design, Percent, Custom Tabs, Leanback, and Palette libraries. Let’s take a closer look.


    Support V4


    The Support V4 library focuses on making supporting a wide variety of API levels straightforward with compatibility shims and backporting specific functionality.


    NestedScrollView is a ScrollView that supports nested scrolling back to API 4. You’ll now be able to set a OnScrollChangeListener to receive callbacks when the scroll X or Y positions change.


    There are a lot of pieces that make up a fully functioning media playback app, with much of it centered around MediaSessionCompat. A media button receiver, a key part to handling playback controls from hardware or bluetooth controls, is now formalized in the new MediaButtonReceiver class. This class makes it possible to forward received playback controls to a Service which is managing your MediaSessionCompat, reusing the Callback methods already required for API 21+, centralizing support on all API levels and all media control events in one place. A simplified constructor for MediaSessionCompat is also available, automatically finding a media button receiver in your manifest for use with MediaSessionCompat.


    Media Router


    The Media Router Support Library is the key component for connecting and sending your media playback to remote devices, such as video and audio devices with Google Cast support. It also provides the mechanism, via MediaRouteProvider, to enable any application to create and manage a remote media playback device connection.


    In this release, MediaRouteChooserDialog (the dialog that controls selecting a valid remote device) and MediaRouteControllerDialog (the dialog to control ongoing remote playback) have both received a brand new design and additional functionality as well. You’ll find the chooser dialog sorts devices by frequency of use and includes a device type icon for easy identification of different devices while the controller dialog now shows current playback information (including album art).


    To feel like a natural part of your app, the content color for both dialogs is now based on the colorPrimary of your alert dialog theme:


    <!-- Your app theme set on your Activity -->
    <style name="AppTheme" parent="Theme.AppCompat.Light.DarkActionBar">
    <item name="colorPrimary">@color/primary</item>
    <item name="colorPrimaryDark">@color/primaryDark</item>
    <item name="alertDialogTheme">@style/AppTheme.Dialog</item>
    </style>


    <!-- Theme for the dialog itself -->
    <style name="AppTheme.Dialog" parent="Theme.AppCompat.Light.Dialog.Alert">
    <item name="colorPrimary">@color/primary</item>
    <item name="colorPrimaryDark">@color/primaryDark</item>
    </style>


    RecyclerView


    RecyclerView is an extremely powerful and flexible way to show a list, grid, or any view of a large set of data. One advantage over ListView or GridView is the built in support for animations as items are added, removed, or repositioned.


    This release significantly changes the animation system for the better. By using the new ItemAnimator’s canReuseUpdatedViewHolder() method, you’ll be able to choose to reuse the existing ViewHolder, enabling item content animation support. The new ItemHolderInfo and associated APIs give the ItemAnimator the flexibility to collect any data it wants at the correct point in the layout lifecycle, passing that information into the animate callbacks.


    Note that this new API is not backward compatible. If you previously implemented an ItemAnimator, you can instead extend SimpleItemAnimator, which provides the old API by wrapping the new API. You’ll also notice that some methods have been entirely removed from ItemAnimator. For example, if you were calling recyclerView.getItemAnimator().setSupportsChangeAnimations(false), this code won’t compile anymore. You can replace it with:


    ItemAnimator animator = recyclerView.getItemAnimator();
    if (animator instanceof SimpleItemAnimator) {
    ((SimpleItemAnimator) animator).setSupportsChangeAnimations(false);
    }


    AppCompat


    One component of the AppCompat Support Library has been in providing a consistent set of widgets across all API levels, including the ability to tint those widgets to match your branding and accent colors.


    This release adds tint aware versions of SeekBar (for tinting the thumb) as well as ImageButton and ImageView (providing backgroundTint support) which will automatically be used when you use the platform versions in your layouts. You’ll also find that SwitchCompat has been updated to match the styling found in Android 6.0 Marshmallow.


    Design


    The Design Support Library includes a number of components to help implement the latest in the Google design specifications.


    TextInputLayout expands its existing functionality of floating hint text and error indicators with new support for character counting.


    AppBarLayout supports a number of scroll flags which affect how children views react to scrolling (e.g. scrolling off the screen). New to this release is SCROLL_FLAG_SNAP, ensuring that when scrolling ends, the view is not left partially visible. Instead, it will be scrolled to its nearest edge, making fully visible or scrolled completely off the screen. You’ll also find that AppBarLayout now allows users to start scrolling from within the AppBarLayout rather than only from within your scrollable view - this behavior can be controlled by adding a DragCallback.


    NavigationView provides a convenient way to build a navigation drawer, including the ability to creating menu items using a menu XML file. We’ve expanded the functionality possible with the ability to set custom views for items via app:actionLayout or using MenuItemCompat.setActionView().


    Percent


    The Percent Support Library provides percentage based dimensions and margins and, new to this release, the ability to set a custom aspect ratio via app:aspectRatio. By setting only a single width or height and using aspectRatio, the PercentFrameLayout or PercentRelativeLayout will automatically adjust the other dimension so that the layout uses a set aspect ratio.


    Custom Tabs


    The Custom Tabs Support Library allows your app to utilize the full features of compatible browsers including using pre-existing cookies while still maintaining a fast load time (via prefetching) and a custom look and actions.


    In this release, we’re adding a few additional customizations such as hiding the url bar when the page is scrolled down with the new enableUrlBarHiding() method. You’ll also be able to update the action button in an already launched custom tab via your CustomTabsSession with setActionButton() - perfect for providing a visual indication of a state change.


    Navigation events via CustomTabsCallback#onNavigationEvent() have also been expanded to include the new TAB_SHOWN and TAB_HIDDEN events, giving your app more information on how the user interacts with your web content.


    Leanback


    The Leanback library makes it easy to build user interfaces on TV devices. This release adds GuidedStepSupportFragment for a support version of GuidedStepFragment as well as improving animations and transitions and allowing GuidedStepFragment to be placed on top of existing content.


    You’ll also be able to annotate different types of search completions in SearchFragment and staggered slide transition support for VerticalGridFragment.


    Palette


    Palette, used to extract colors from images, now supports extracting from a specific region of a Bitmap with the new setRegion() method.


    SDK available now!


    There’s no better time to get started with the Android Support Library. You can get started developing today by updating the Android Support Repository from the Android SDK Manager.


    For an in depth look at every API change in this release, check out the full API diff.


    To learn more about the Android Support Library and the APIs available to you through it, visit the Support Library section on the Android Developer site.


    Android Studio 1.4

    Posted by, Jamal Eason, Product Manager, Android


    Today we are releasing the 1.4 update to the Android Studio stable release channel. Most of the work and enhancements for Android Studio 1.4 are under the hood. However we have a handful of new features that we hope you enjoy and integrate into your workflow.


    Note that some of new features (e.g. vector assets) require you to use Gradle Plugin 1.4 for your app project. The beta version of the Gradle plugin (1.4.0-beta3 ) is available today on jcenter with the final version coming in the next few weeks.


    New Features in Android Studio 1.4


    Design Tools


    • Vector Assets

      Starting with API 21, you can use Vector Drawables for image assets. For most apps, using VectorDrawables decreases the amount of density dependent drawables you need to maintain, and will also give you sharp image assets regardless of the screen device densities your app supports.


      With Android Studio 1.4, we are making the process of importing SVG images or Material icons much easier. If you update your Gradle Android plugin to 1.4.0-beta3 (or higher) in the project structure dialogue or your project build.gradle file ( 'com.android.tools.build:gradle:1.4.0-beta3'
      ), you can now use the new Vector Asset Studio by right-clicking the res/drawable folder in your project and selecting New → Vector Asset from the content menu.


      We are also excited to offer backwards compatibility for your vector assets in Android Studio 1.4. Once you have a vectorDrawable image in your res/drawable, the Gradle plugin will automatically generate raster PNG images for API level 20 and below during build time. This means you only need to update and maintain your vector asset for your app project and Android Studio can take care of image conversion process. Note, it is still best practice to create density dependent launcher icons in your res/mipmap folder. Learn more by watching the DevByte video on the new Vector Asset Studio tool.


    • Theme Editor

      We understand that managing your app theme and style can be a bit complex. With Android Studio 1.4, we are releasing a preview of the Theme Editor to help with this task. This first version of the Theme Editor is focused on editing and updating the material theme colors (colors.xml) in your app project. In future releases, we will cover more attributes of your app theme and styles files. To access the editor, navigate from top level menu Tools → Android → Theme Editor.


    • Project Templates

      We know many of you use the New Project Wizard app templates to start a new app project or to quickly add an activity to an existing app. To help with the visual design of your apps, we updated the app templates to include the Android Design Support Library alongside the AppCompat Support library.


      From the template wizard you can start projects with a basic blank template with a floating action button or start from a range of user interface components such as the navigation drawer, or AppBar with scrolling view. We also re-introduced the empty app template for those who want minimum code generation when adding an activity to your project.


      With Android Studio 1.4, you can also validate your apps on the new Nexus 5X and Nexus 6P screen sizes.


    Performance Monitors


    • GPU Rendering Monitor

      Now it is possible to quickly inspect the GPU rendering performance of your app. To enable GPU monitoring, make sure you turn on monitoring for your Android hardware device or emulator under Setting → Developer Options → Profile GPU rendering → In adb shell dumpsys gfxinfo . To learn more about the GPU rendering results, check out the developer documentation.


    • Network Monitor

      With Android Studio 1.4, you can also monitor the network usage of your app. With the monitor you can track the transmit and receive rates of your app over time.


    Developer Services


    • Firebase

      It is now even easier to add a Firebase mobile backend to your Android app. Firebase includes data storage, user authentication, static hosting, and more. To access the feature, navigate from the top level menu and select File → Project Structure → Cloud. Learn more about Firebase in this tutorial.


    Whats Next


    For current developers on Android Studio, you can check for updates from the navigation menu (Help → Check for Update [Windows/Linux] , Android Studio → Check for Updates [OS X]) . For new users, you can learn more about Android Studio on the product overview page or download the stable version from the Android Studio download site.


    We welcome feedback on how we can help you. Connect with the Android developer tools team on Google+.

    Android 6.0 Marshmallow coming to devices soon

    Posted by, Dave Burke, VP of Engineering, Android


    Starting next week, Android 6.0 Marshmallow will begin rolling out to supported Nexus devices around the world, including Nexus 5, Nexus 6, Nexus 7 (2013), Nexus 9, Nexus Player, and Android One. At the same time, we’ll be pushing the Android 6.0 source to the Android Open Source Project (AOSP), which marks the official beginning of public availability.


    Today we also introduced two great new Nexus devices that will be among the first to run the Android 6.0 Marshmallow platform. These devices let your apps use the latest platform features and take advantage of the latest hardware optimizations from our partners. Let’s take a look at how to make sure your apps look great on these new devices.


    Introducing Nexus 5X and Nexus 6P


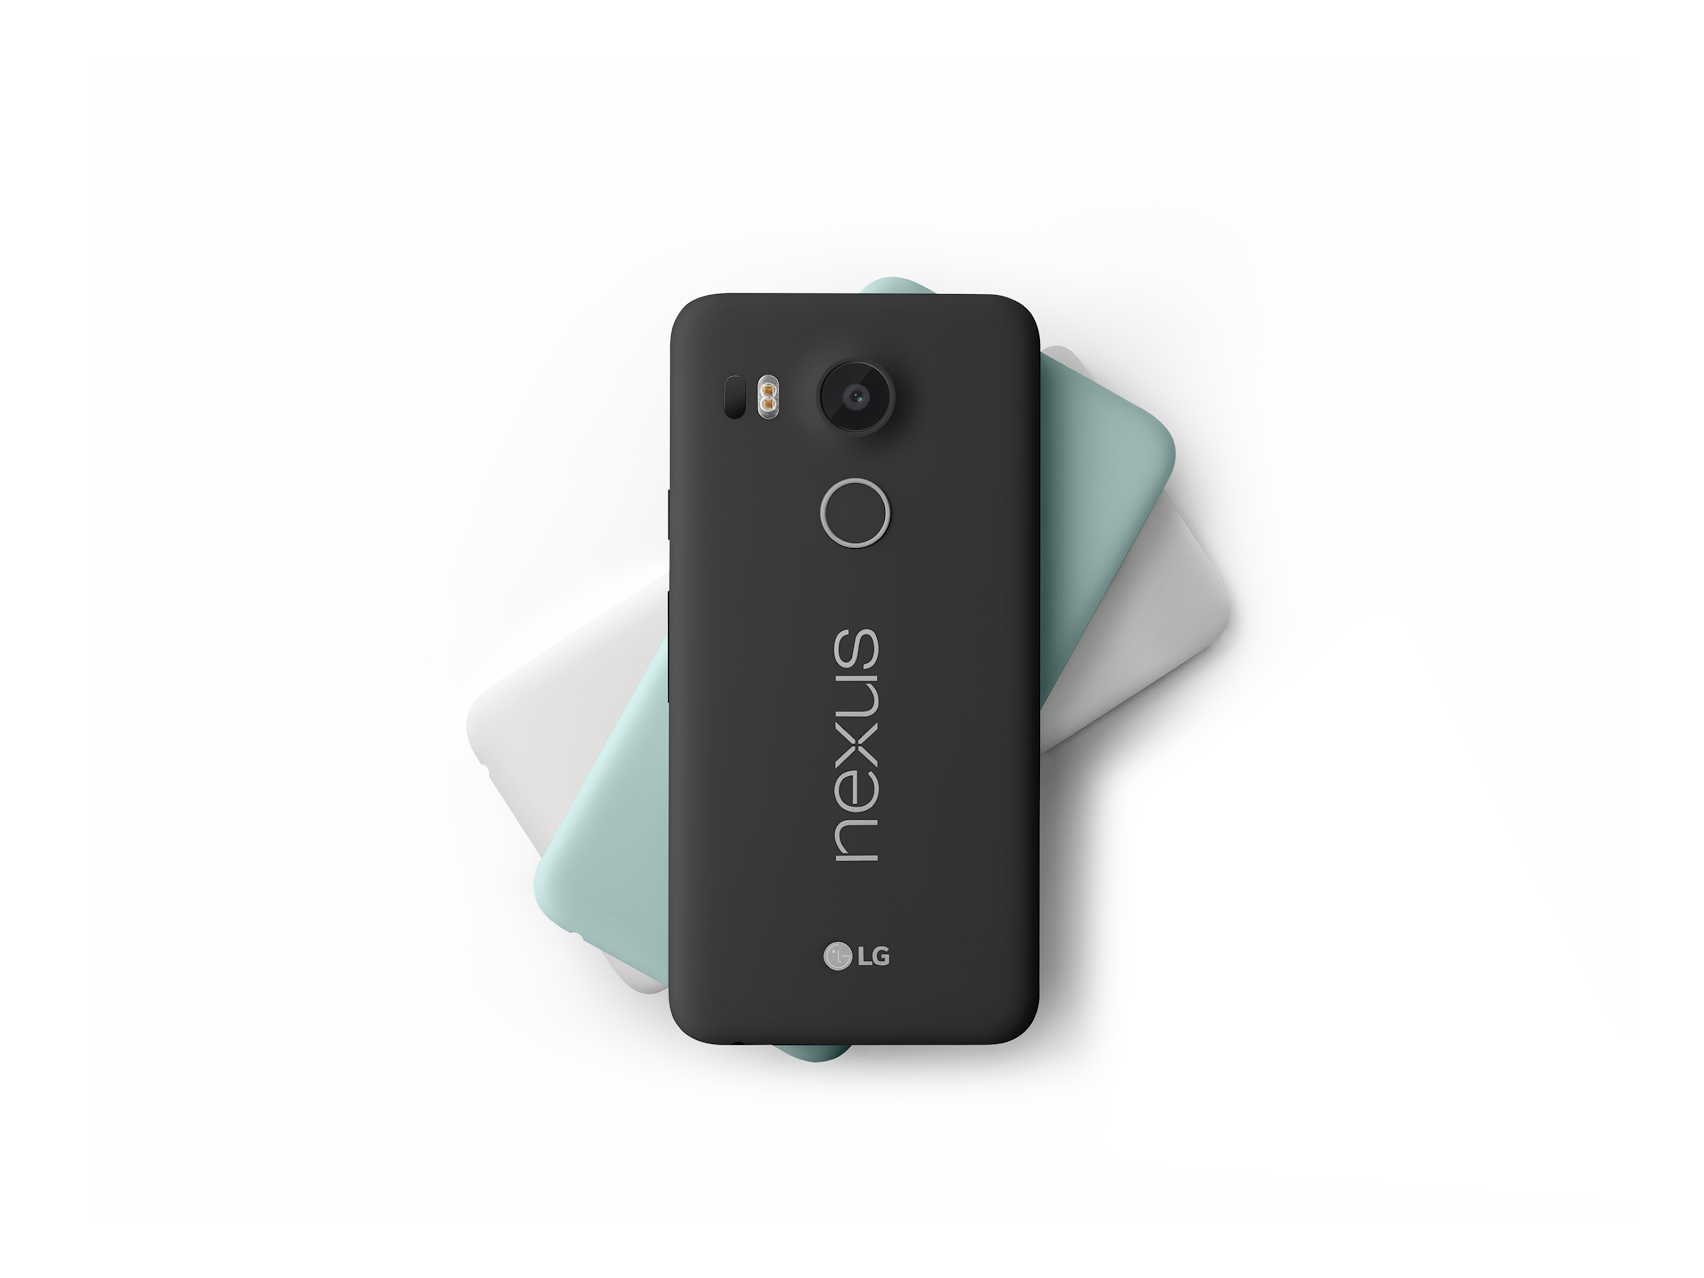
    Nexus 5X


    Nexus 6P


    The Nexus 5X is built in partnership with LG. It’s equipped with a 5.2-inch FHD LCD 1080p display, a Snapdragon™ 808 processor (1.8 GHz hexa-core, 64-bit), and a 12.3 MP rear camera. Offering top-line performance in a compact, lightweight device.


    The Nexus 6P, built in partnership with Huawei, has a 5.7-inch WQHD AMOLED display, Snapdragon™ 810 v2.1 processor (2.0 GHz octa-core 64-bit), front-facing stereo speakers, and a 12.3 MP rear camera, all housed in a diamond-cut aluminum body.


    Both devices have USB Type-C ports and fingerprint sensors, and include the latest hardware features for Android, such as: Android Sensor Hub, low-power Wi-Fi scanning with channel selection, batching, and BSSID hotlists, Bluetooth 4.2 with ultra low-power BLE notifications, and more.


    Get your apps ready


    Take some time to make sure your apps and games are ready to give your users the best mobile experience on these devices.


    Check your assets


    Resolution Screen size Density
    Nexus 5X 1920 x 1080 px
    (730 x 410 dp)
    normal 420 dpi
    Nexus 6P 2560 x 1440 px
    (730 x 410 dp)
    normal 560 dpi


    Nexus 5X has a quantized density of 420 dpi, which falls in between the xhdpi and xxhdpi primary density buckets. Nexus 6P has a density of 560 dpi, which falls in between the xxhdpi and xxxhdpi buckets. The platform will scale down any assets from a higher resolution bucket, but if those aren’t available, then it will scale up the assets from a lower-density bucket.


    For best appearance in the launcher, we recommend that you provide at least an xxxhdpi app icon because devices can display large app icons on the launcher.


    For the rest of your assets, you can consider using vector assets or optionally add versions for the next-higher density bucket. This provides a sharper visual experience, but does increase apk size, so you should make an appropriate decision for your app.


    Make sure you are not filtered on Google Play


    If you are using the <compatible-screens>: element in your AndroidManifest.xml file, you should stop using it because it’s not scalable to re-compile and publish your app each time new devices come out. If you must use it, make sure to update your manifest to add a new configuration for Nexus 5X, since it uses a new density bucket (420). Otherwise, your app may be filtered from Google Play on these devices.


    Wrapping up M Developer Preview


    After three preview releases, and with the final OTA coming soon, it’s time to wrap up the Android M Developer Preview. The feedback you’ve provided has helped make Android 6.0 a great platform for apps and games. Developers in more than 200 countries have been using the Developer Preview to get their apps ready for Android 6.0 Marshmallow users everywhere.


    More developer resources


    If you haven’t taken a look at Android 6.0 Marshmallow yet, visit developer.android.com/mm for complete information about about what’s new for developers and important changes to plan for in your apps — runtime permissions, Doze and App Standby idle modes, Auto Backup for Apps, fingerprint support, and others.


    We’ve also produced a playlist of developer videos to help you get the most out of all the new features in Android 6.0 Marshmallow. Check it out below.


    Final testing and updates


    Now is the time to finish up testing and prepare for publishing. You can use the Developer Preview 3 system images for final testing until early October. After the Android 6.0 public release, you’ll be able to download final images from the Nexus factory images page, and final emulator images from Android Studio.


    Reminder: Devices flashed with an M Developer Preview build won’t receive the Android 6.0 update automatically. You’ll need to manually flash those devices to a public released image first.


    Upload your apps to Google Play


    When your apps are ready, you can update them to Google Play via the Developer Console on all release channels (Alpha, Beta & Production). For apps that target API level 23, Google Play will provide the new optimized download and autoupdate flow based on the runtime permissions model in Android 6.0. Give it a try!


    To make sure that your updated app runs well on Android 6.0 Marshmallow and older versions, we recommend that you use the newly improved beta testing feature on Google Play to get early feedback. You can then do a staged rollout as you release the new version to all users.


    What’s next?


    In mid-October, we’ll be turning down the M Developer Preview community and the M Developer Preview issue tracker. If you've filed bugs against the preview, and you'd like to keep these open against the Android 6.0 final builds, you can file a new issue in the AOSP issue tracker.


    Thanks to everyone who participated in the Android M Developer Preview. Let us know how this year’s preview met your needs by taking a short survey. Your feedback helps shape our future releases.


    Support for 100MB APKs on Google Play

    Posted by Kobi Glick, Google Play team


    Smartphones are powerful devices that can support diverse tasks from graphically intensive games to helping people get work done from anywhere. We understand that developers are challenged with delivering a delightful user experience that maximizes the hardware of the device, while also ensuring that their users can download, install, and open the app as quickly as possible. It’s a tough balance to strike, especially when you’re targeting diverse global audiences.


    To support the growing number of developers who are building richer apps and games on Google Play, we are increasing the APK file size limit to 100MB from 50MB. This means developers can publish APKs up to 100MB in size, and users will see a warning only when the app exceeds the 100MB quota and makes use of Expansion Files. The default update setting for users will continue to be to auto-updating apps over Wi-Fi only, enabling users to access higher quality apps and games while conserving their data usage.


    Even though you can make your app bigger, it doesn’t always mean you should. Remember to keep in mind the following factors:


    • Mobile data connectivity: Users around the world have varying mobile data connectivity speeds. Particularly in developing countries, many people are coming online with connections slower than those of users in countries like the U.S. and Japan. Users on a slow connection are less likely to install an app or game that is going to take a long time to download.

    • Mobile data caps: Many mobile networks around the world give users a limited number of MB that they can download each month without incurring additional charges. Users are often wary of downloading large files for fear of exceeding their limits.

    • App performance: Mobile devices have limited RAM and storage space. The larger your app or game, the slower it may run, particularly on older devices.

    • Install time: People want to start using your app or game as quickly as possible after tapping the install button. Longer wait times increase the risk they’ll give up.


    We hope that, in certain circumstances, this file size increase is useful and enables you to build higher quality apps and games that users love.


    Introducing Android Developer Nanodegree in India with Udacity—1000 scholarships available

    Originally posted on the Google India blog


    Posted by Peter Lubbers, Senior Program Manager, Google


    With a vision to transform India into a hub of high-quality mobile developers for global and local apps, we’re delighted to announce the launch of a program to offer Android Developer Nanodegrees in India in partnership with Udacity. The Android Nanodegree is an education credential that is designed to help developers learn new skills and advance their careers in a few months—from anywhere on any device—at their own pace.


    The Udacity Android Nanodegree program comprises of courses developed and taught by expert Google instructors from the Google Developer Relations team and will include project reviews, mentorship and career services from Udacity. The curriculum will be updated regularly with new releases and will provide developers with a certificate that will help them to be a more marketable Android developer.


    With 3 million software developers, India is already the second largest developer population in the world, but we still lag behind in creating world-class apps. With the launch of this program we want to bridge the gap by providing India’s developer community with an easy way to learn and build high quality apps for the world. Today, only less than 2% of apps built in India feature in top 1000 apps globally and our goal is to raise this to 10% in next three years.


    The Udacity Android Nanodegree program is open for enrollment from today. The program takes an average of 6-9 months to complete and costs Rs. 9,800 per month with Udacity refunding 50 percent of the tuition upon completion. Google and Tata Trusts have partnered to give 1000 scholarships for the Android Nanodegree to deserving students and will be available from today. Interesting applicants can visit https://www.udacity.com/india for more information.


    Speaking about their association with the Android Nanodegree program, Mr. Venkat - Managing Director of Tata Trusts said, “India has one of the youngest population of developers, where the average age of a developer is just 25 years old. While the last decade has established India as the largest provider of a skilled IT workforce to the world, there is an opportunity to help our young developers and equip them to compete on a global stage through educational and skill building programs. As part of our association, we’re glad to announce 500 free scholarships for the complete Android Nanodegree."

    New Android Marshmallow sample apps

    Posted by Rich Hyndman, Developer Advocate


    Three new Android Marshmallow sample applications have gone live this week. As usual they are available directly from the Google Samples repository on GitHub or through the Android Studio samples browser.


    Android Direct Share Sample


    Direct Share is a new feature in Android Marshmallow that provides APIs to make sharing more intuitive and quick for users. Direct Share allows users to share content to targets, such as contacts, within other apps. For example, the direct share target might launch an activity in a social network app, which lets the user share content directly to a specific friend in that app.


    This sample is a dummy messaging app, and just like any other messaging apps, it receives intents for sharing a plain text. It demonstrates how to show some options directly in the list of share intent candidates. When a user shares some text from another app, this sample app will be listed as an option. Using the Direct Share feature, this app also shows some of contacts directly in the chooser dialog.


    To enable Direct Share, apps need to implement a Service extending ChooserTargetService. Override the method onGetChooserTargets() and return a list of Direct Share options.


    In your AndroidManifest.xml, add a meta-data tag in your Activity that receives the Intent. Specify android:name as android.service.chooser.chooser_target_service, and point the android:value to the Service.


    Android MidiSynth Sample


    Android 6.0 introduces new support for MIDI. This sample demonstrates how to use the MIDI API to receive and play MIDI messages coming from an attached input device (MIDI keyboard).


    The Android MIDI API (android.media.midi) allows developers to connect a MIDI device to an Android device and process MIDI messages coming from it.


    This sample demonstrates some basic features of the MIDI API, such as:

    • Enumeration of currently available devices (including name, vendor, capabilities, etc)

    • Notification when MIDI devices are plugged in or unplugged

    • Receiving and processing MIDI messages


    It also contains a simple implementation of an oscillator and note playback.


    Android MidiScope Sample


    A sample demonstrating how to use the MIDI API to receive and process MIDI signals coming from an attached device.


    The Android MIDI API (android.media.midi) allows developers to connect a MIDI device to Android and process MIDI signals coming from it. This sample demonstrates some basic features of the MIDI API, such as enumeration of currently available devices (Information includes name, vendor, capabilities, etc), notification when MIDI devices are plugged in or unplugged, and receiving MIDI signals. This sample simply shows all the received MIDI signals to the screen log and does not play any sound for them.


    Check out a sample today and jumpstart your Android Marshmallow development.